
DIY: Make your own cotton face mask with items you have at home
An easy step-by-step guide…
Following new guidelines from the UAE government which require everyone to wear a mask while outside, many residents have expressed concern over the mask shortage. The guidelines suggest you can use a mask alternative in its place, so we thought we’d try one of the many online tutorials to DIY a cotton face mask.
This mask won’t be as protective as a medical-approved version, however it is reuseable and may help protect from bacteria and viruses, as well as water droplets travelling through the air.
You don’t need textile skills to be able to create a practical mask, and it doesn’t need to be neat and perfect. This crafty project is a fun way to spend an afternoon at home. The entire process took around one hour to complete.
The video tutorial we followed can be found here, or see below for our step-by-step guide.
You will need
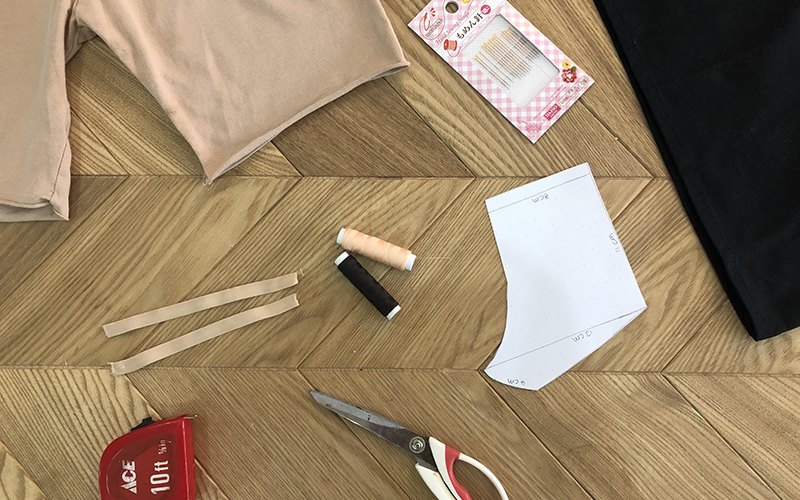
Scissors, pencil, paper, ruler or tape measure, an old cotton t-shirt or pillowcase for the lining and a sturdier cotton for the front piece (we used an apron). You will also need two pieces of elastic at 12cm each and a needle and thread (preferably the same colour as your outer fabric).
1. Make your stencil
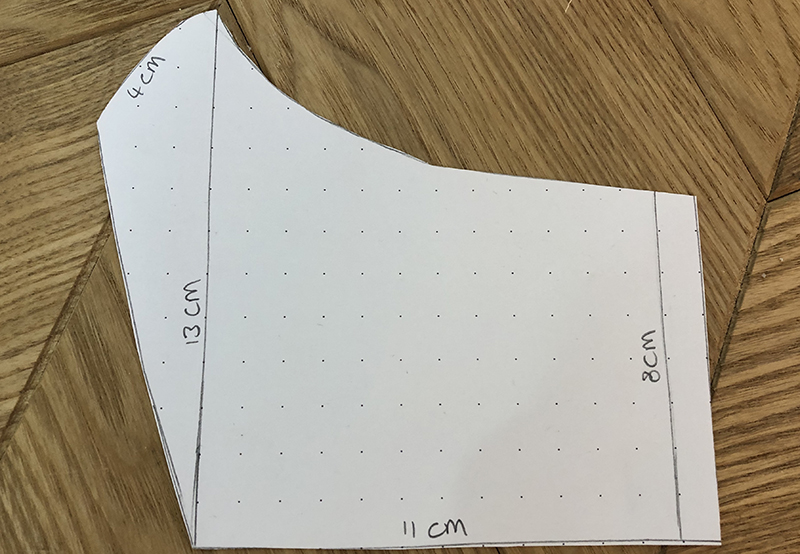
The stencil can be sketched out on any piece of paper. The tallest part is 13cm, and the shorter edge is 8cm. Along the bottom is 11cm, then you will need to free-hand your curved edges so that it looks similar to the image above.
2. Cut your fabric
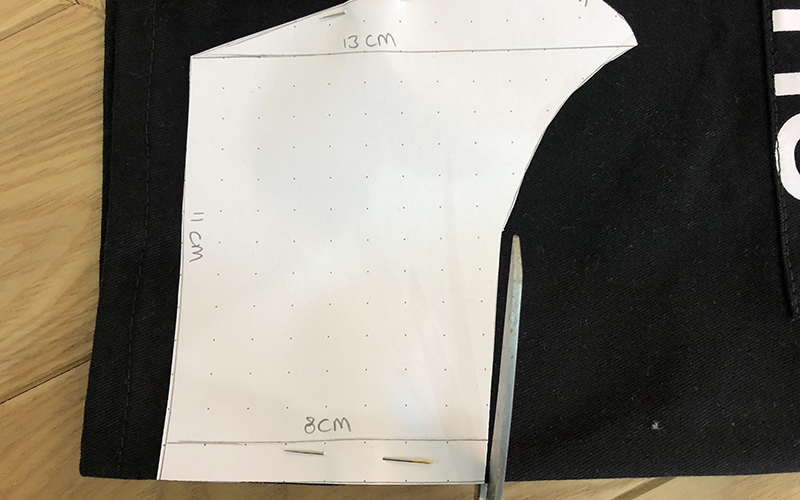
You will need two pieces identical to the stencil in each fabric, this doesn’t have to be neat and perfect, but they should all be the same size at the end.
3. Stitch the twin pieces together
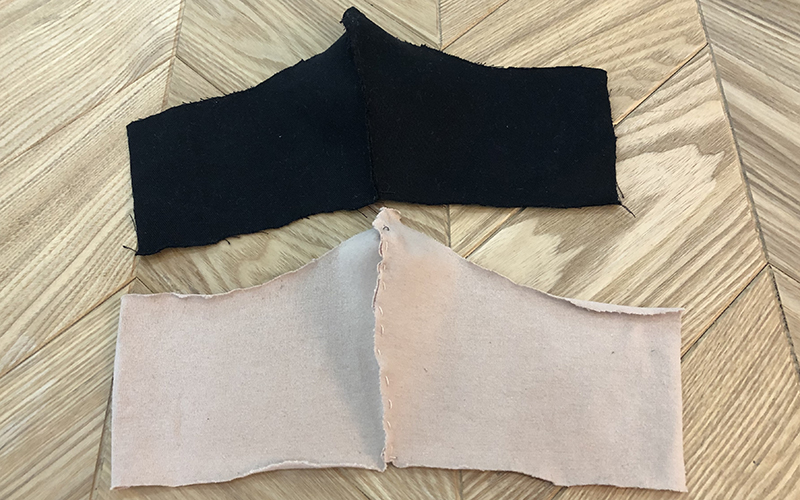
Next, stitch the longest part of each piece to its twin. You can place them back to back and use a rough stitch so that they form a peak once stitched.
4. Sew the top and bottom
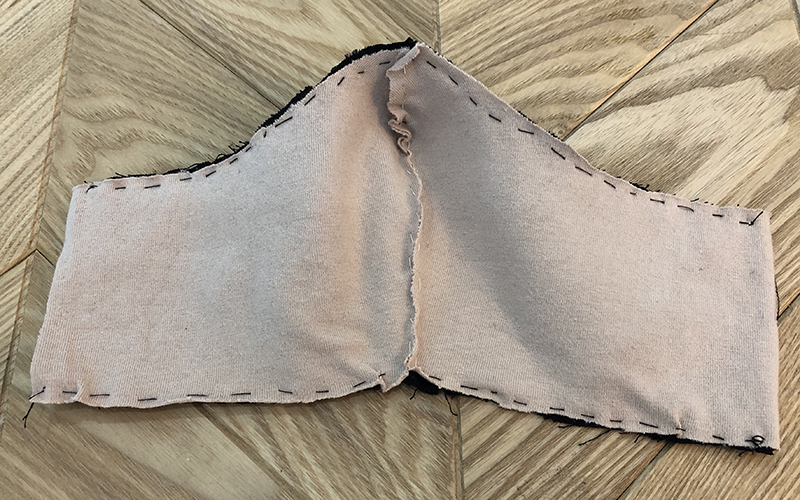
Place your two pieces back to back with the rough sides facing outward. Sew along the top and bottom, joining the pieces together. Leave the sides open for now.
5. Attach your first elastic
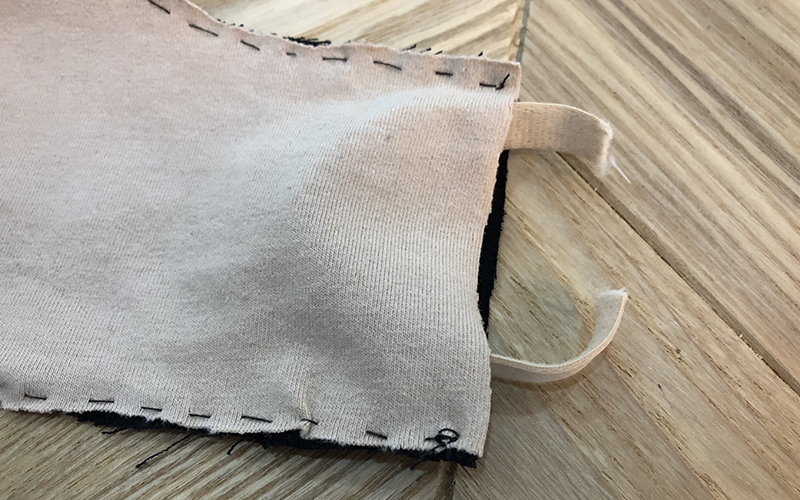
Tuck one piece of elastic inside the mask as shown, careful that it doesn’t become twisted. Then stitch right along that edge.
6. Flip it, and sew the other elastic
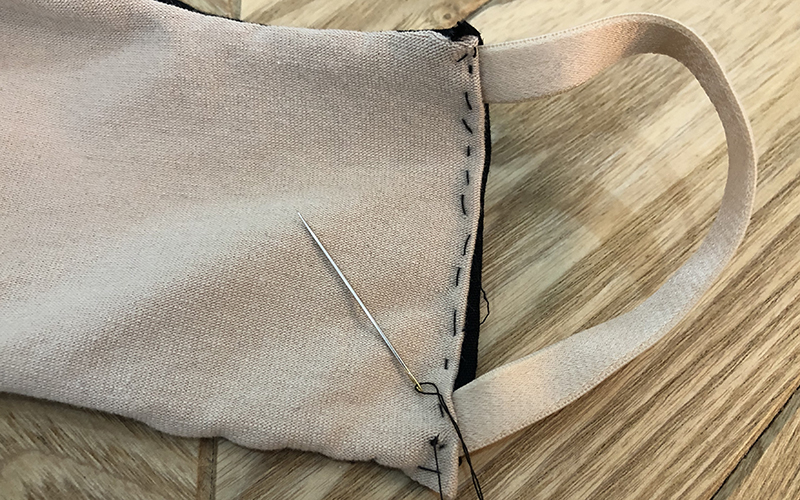
Flip your mask inside out so that the seams are hidden. Next, attach your final elastic, tucking in the rough edges as you sew along the edge.
7. Final touches
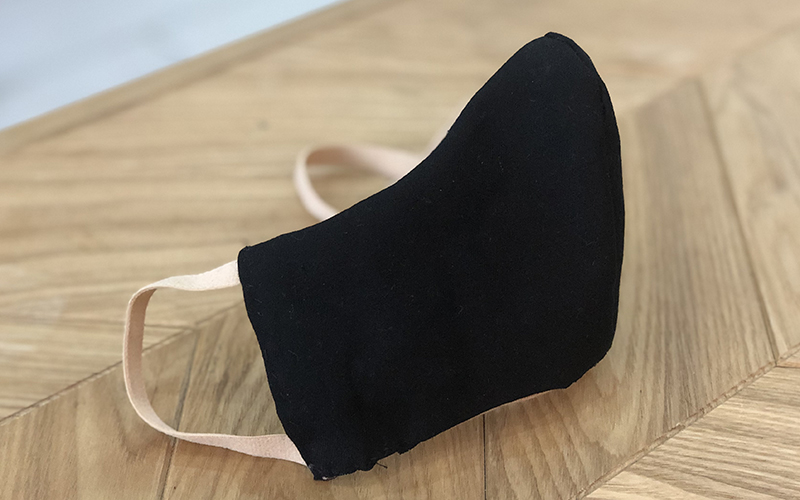
If you notice any gaps in your mask, fill these in now. You might need an iron to create a nice crease for your mask to sit properly. Then try it on.